|
|
 |
|
 |
|
|
|
|
|
Follow these simple instructions for laying resilient floor tile of any type. Completely read all instructions before starting the job. If any part is unclear, call or visit the store where you purchased the materials and ask for further information.
|
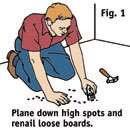
 PREPARE THE BASE
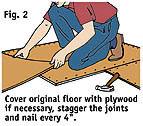
FLOOR PREPARE THE BASE
FLOOR
|
 |
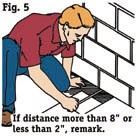
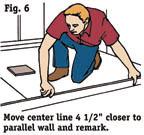
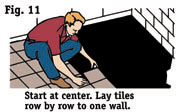
 START FROM THE EXACT CENTER OF THE ROOM The first run of floor tile should be started from the exact center of the floor, so use these steps to locate the center of the room:
|

|
 MAKE A FINAL CHECK WITH LOOSE TILE
|
|
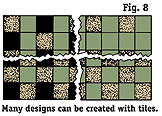
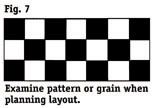
 PREPARE THE PLAN FOR TILE APPLICATION
|
|
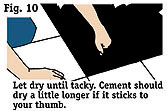
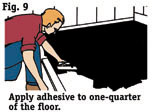
 APPLY THE TILE CEMENT APPLY THE TILE CEMENT
The next step - now that you have correctly marked the center of the room and selected the tile designs and patterns - is applying the adhesive for the tile. If you are using self-sticking tile, skip this section.
|
|
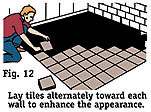
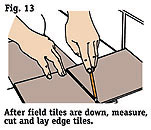
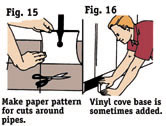
 LAY THE FLOOR TILES LAY THE FLOOR TILES
IMPORTANT NOTE |
TOOL AND MATERIAL CHECKLIST
| Chalk | Chalk Line | Mastic | Mastic Trowel |
| Plane | Cement | Sandpaper | Steel Square |
| Ordinary Scissors | Brush | Level | Scraper |
| Tape or Folding Rule | Hand Cleaner |
Check your state and local codes before starting any project. Follow all safety precautions. Information in this on-line brochure has been furnished by the National Retail Hardware Association. Every effort has been made to ensure accuracy and safety. Neither the NRHA nor the retailer can be held responsible for damages or injuries resulting from the use of the information in this document.