|
||
 |
||

|
|
||
|
||
|
|
|
|
 SCREEN REPAIRS
|
|
|

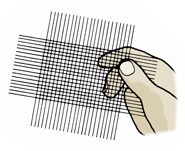
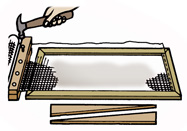
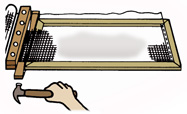
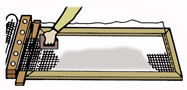
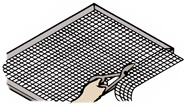
REPLACING SCREENING IN WOOD FRAMES
|
|
|

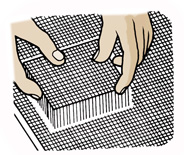
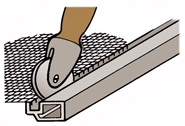
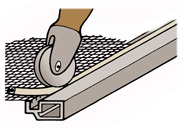
REPLACING SCREENING IN METAL FRAMES
|
|
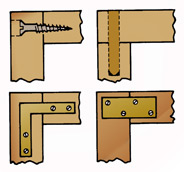 FIG. 13 - Screws and dowels are useful where the outside layer of wood has been weakened, while mending plates go on simply and quickly. |

FRAME REPAIRS
|
|
|

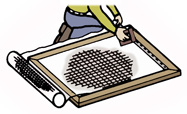
PAINTING SCREENS
|
|
|

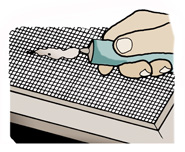
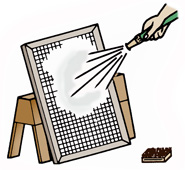
CLEANING SCREENS
|
|
|
|
| 18" x 16" or 18" x 14" Screening | Snap-On Screen Patches |
| Heavy-Duty Scissors | Heavy-Duty Stapler |
| Try or Framing Square | Measuring Tape or Rule |
| Utility Knife | Claw Hammer |
| Screen Molding | Nail Set |
| Drill and Bits | Screwdriver |
| Long-Nosed Pliers | Metal Snips |
| Tack Hammer | Spline Tool |
| Sawhorses | Screws |
| Dowels, 3/8" or 1/2" | Mending Plates |
| Shop Vacuum with Upholstery Brush | Paintbrush or Pad |
| Exterior Trim Paint | 1x2 and 1x4 Stock |
| Paint Solvent | Sandpaper, 80 or 100 Grit |
| Clean-Up Rags | Garden Hose |
| Stiff-Bristled Brush | 2x4 Boards |
| 2 C-Clamps, 3" or Larger | Exterior Wood Glue |
| Plastic Spline Material | |
Check your state and local codes before starting any project. Follow all safety precautions. Information in this document has been furnished by the National Retail Hardware Association (NRHA) and associated contributors. Every effort has been made to ensure accuracy and safety. Neither NRHA, any contributor nor the retailer can be held responsible for damages or injuries resulting from the use of the information in this document.